Introduction
This post covers how to start GRASS 7 for the first time. Including defining a GRASS database and a location with a projection. The manual is for GRASS 7 on Mac OSX and is part of a series on how to delineate river basins using GRASS GIS and other tools.
The manual only covers the command line GRASS tools for processing. But all the processing can also be done using the GRASS Graphical User Interface (GUI).
Prerequisites
You must have GRASS 7 installed as described in the post on Install GDAL, QGIS and GRASS. You also need a projected raster file (e.g. a GeoTIFF) for defining both the projection and the location.
Start GRASS
Before you actually start GRASS, you need to start up a Terminal session. Otherwise GRASS might not start properly. Once you have the Terminal up and running locate your installation of GRASS7 and start it. Alternatively you can also start GRASS7 directly from the command line, just type in the full path to the grass.sh executable script:
/Applications/GRASS-7.X.X.app/Contents/MacOS/Grass.sh
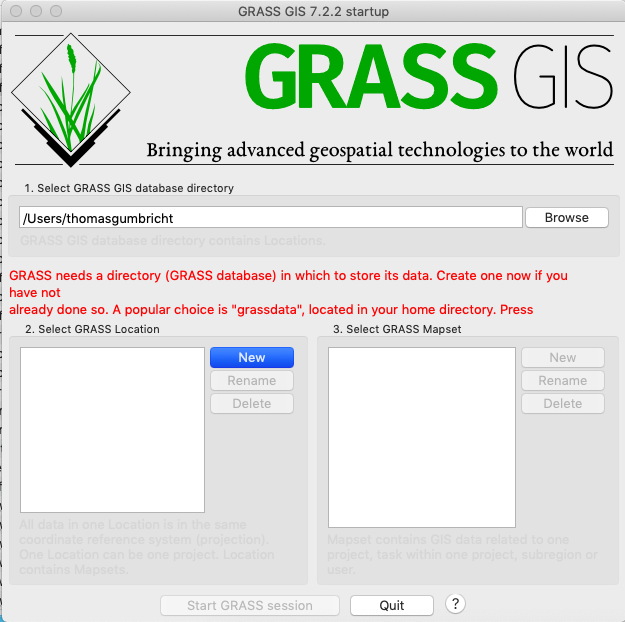
The startup might take a while, and GRASS should then show the window GRASS GIS 7.x.x Startup.
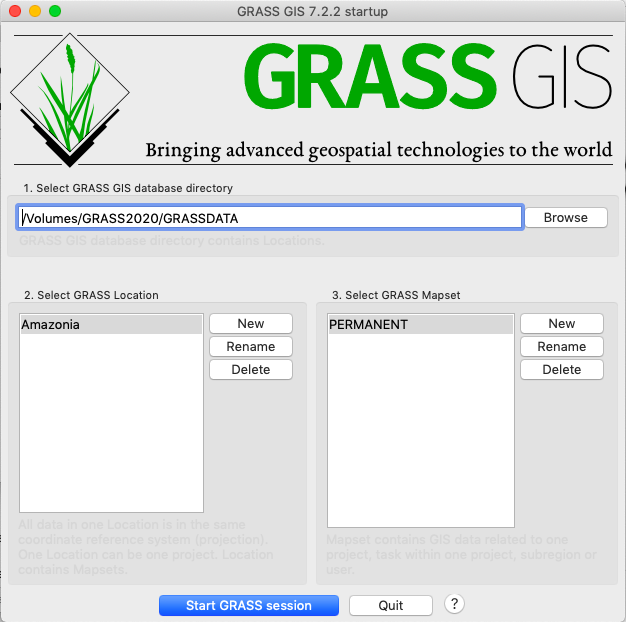
If the location you want to work with is already defined in your GRASS database, it is listed as a GRASS location (the location Amazonia in the example below). You can then just skip to the last section in this post Create a new mapset.
Define new GRASS Location
The first time you start GRASS7 you have to set the database directory, and a first Location. As noted on the startup page, in red even, GRASS needs a directory (GRASS database) in which to store its data …. The default database directory is the users home directory. The basin delineation will, however, require a rather large storage space and I recommend using an external disk or server for the data storage.
Use the button to select the location for your GRASS database. Then use the button between the smaller windows for 2 Select GRASS Location and 3. Select GRASS Mapset. GRASS then presents you with a new window, Define new GRASS Location.
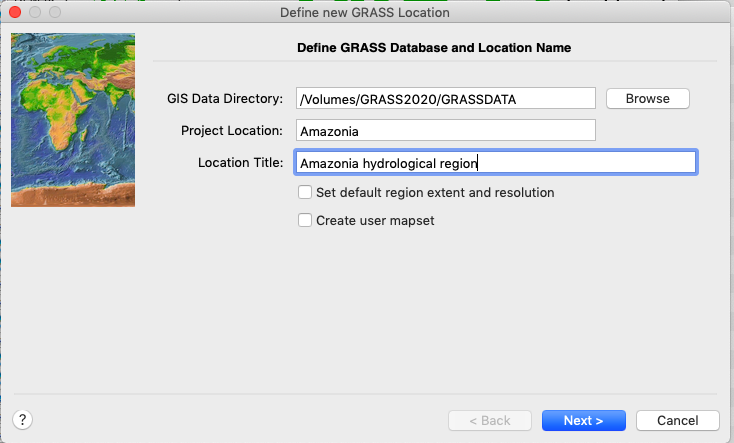
In the example figure above, I created a local disk GRASS2020 and then the directory GRASSDATA for my GRASS database. I then also defined a Location called Amazonia. All GRASS locations will get a default MapSet called PERMANENT; let that be your initial mapset for the Location you define.
Do not tick the boxes for Set default region extent and resolution or Create user mapset, we will fix that in the next step. Click to get to the next step.
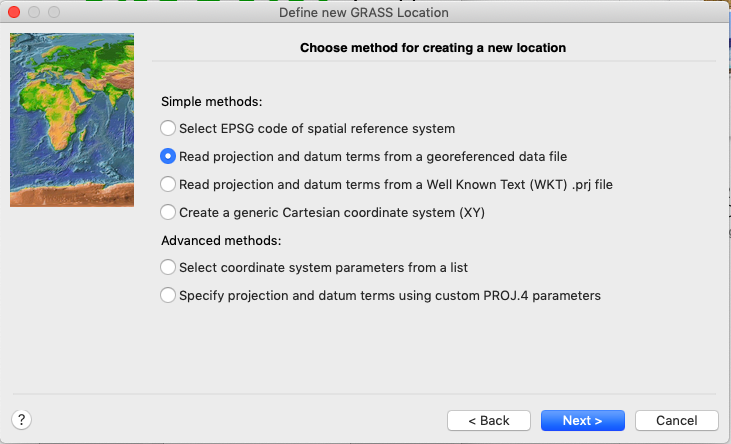
Choose method for creating a new location
A new window, but still belonging to the Define new GRASS Location set, opens. The best option here is to have a projected raster file that you can point at for defining the location. Assuming that you have one, click the radiobutton for that option.
Click and browse to the raster file to use for creating the new location. If you did not select the option to use an existing file for creating the new location, you need to manually add the projection and location.
When you have added all the information required, GRASS will summarise the definition of the new location.
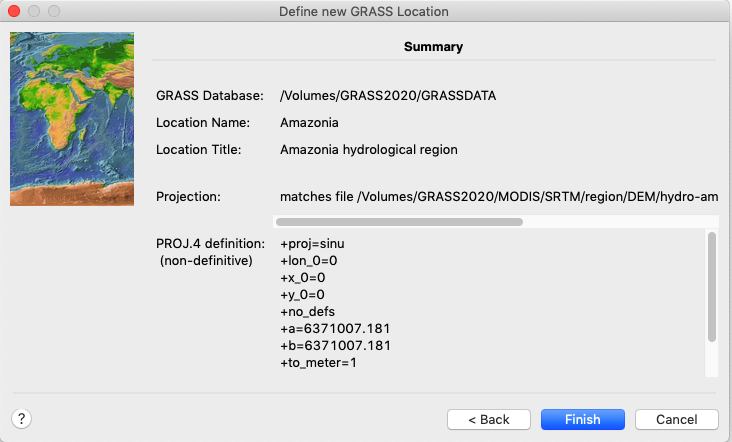
Click and you are done with the definition of database, location and projection of your first GRASS7 project.
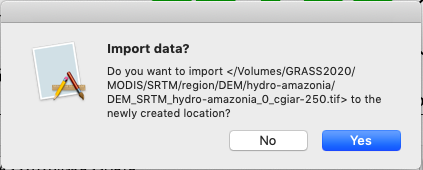
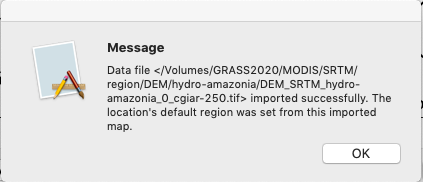
Import raster defining the location
If you choose to define your location using a raster file, like illustrated above, GRASS7 will automatically ask if you want to import this data. In most cases the answer is most likely . Whereupon the file should be successfully imported into the MapSet PERMANENT. Click and GRASS7 should start its Graphical User interface.
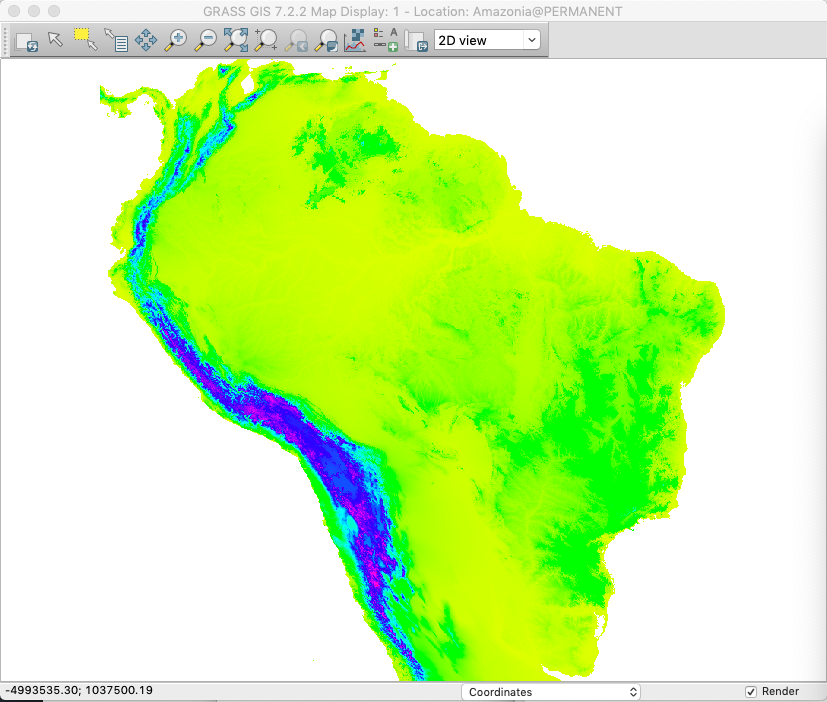
GRASS Graphical User Interface (GUI)
GRASS7 opens an empty GUI with two windows, a Map Display and a Layer Manager.
In the Layer Manager find the button for Add multiple raster or vector map layers and click it. Add the raster file you used for defining the location and projection.
GRASS commandline
You can either user GRASS via the GUI, or using the GRASS commandline. If you started GRASS with the Terminal up and running, you should now have a terminal windown where GRASS is running.
Commandline tools
Try the commandline tool by checking out the projection:
GRASS 7.2.2 (Amazonia):~ > g.proj -p
The projection information will be returned at the prompt:
-PROJ_INFO-------------------------------------------------
name       : Sinusoidal (Sanson-Flamsteed)
a          : 6371007.181
es         : 0
proj       : sinu
lon_0      : 0
x_0        : 0
y_0        : 0
no_defs    : defined
-PROJ_UNITS------------------------------------------------
unit       : meter
units      : meters
meters     : 1
Then also check the region:
GRASS 7.2.2 (Amazonia):~ > g.region -p
Note how the returned information specifies the boundaries of the region as well as the spatial resolution and the number of rows and columns (cols) that span the region.
projection: 99 (Sinusoidal (Sanson-Flamsteed))
zone:       0
datum:      ** unknown (default: WGS84) **
ellipsoid:  a=6371007.181 es=0
north:      1297275.606933
south:      -3914992.450317
west:       -9080929.2446
east:       -3822329.91573
nsres:      231.6563581
ewres:      231.6563581
rows:       22500
cols:       22700
cells:      510750000
Rename layer
In the following parts of this series on Basin delineation, the name of the DEM layer to use for delineating basins will be assumed to be DEM. If you imported the DEM as part of the definition of your location, it will be given the same name as the original map. If you forgot the name, use the GRASS general command g.list to list the layers in the current mapset:
> g.list type=raster
If your DEM is not listed, make sure you are in the correct mapset with the command g.mapset:
> g.mapset -p
> g.mapset mapset=name
Rename any layer in your current mapset with the GRASS general command g.rename:
> g.rename raster=DEM_SRTM_amazonia_0_cgiar-250,DEM
Import DEM
To manually import the DEM, and at the same time set a custom name you can use the GRASS command r.in.gdal. Add the -e flag to set the region to the extent of the imported DEM if not already set to fit this dataset.
> r.in.gdal -e input=/Volumes/GRASS2020/MODIS/SRTM/region/DEM/amazonia/DEM_SRTM_amazonia_0_cgiar-250.tif output=DEM –overwrite
Create a new mapset
The DEM raster file that you imported, either when you defined the projection and location, or as a separate raster layer, should have ended up in the mapset PERMANENT. For the delineation work, deriving a range of intermediate layers, and finally getting a map of all the basin outlets, it is better to change to a user defined mapset. Use the GRASS command g.mapset.
> g.mapset -c drainage
Exit GRASS
To end the session you need to to exit from the GRASS commandline:
GRASS 7.2.2 (Amazonia):~ > exit